Chicken Katsu Recipe
Introduction: Chicken Katsu is a beloved Japanese dish, typically consisting of breaded and deep-fried chicken cutlets. It’s crispy on the outside and tender on the inside, served with a side of rice and drizzled with a tangy katsu sauce. This recipe is a variation of the classic Japanese tonkatsu, which traditionally uses pork instead of chicken. Chicken Katsu is popular in Japan, and it has gained international popularity as a comforting, flavorful meal.
The History of Chicken Katsu:
Chicken Katsu, or “chikin katsu” in Japanese, is part of a broader category of dishes called “katsu” in Japan, meaning “cutlet.” Originally, the katsu concept came from Western influences in Japan during the Meiji era (1868-1912). The idea of breading and frying meat was borrowed from European cooking styles, particularly the Austrian “Wiener Schnitzel” and the British “breaded chops.” Over time, the dish evolved into a Japanese classic, with pork becoming the most common choice. However, with its versatility, chicken became a popular option, especially in modern variations.
Ingredients Breakdown:
- Chicken Breast or Thigh: You can use either chicken breast (leaner) or chicken thigh (juicier and more flavorful) for your cutlets.
- Panko Breadcrumbs: These Japanese breadcrumbs are coarser than regular breadcrumbs, which gives the katsu its signature crispy texture.
- Flour: This is used to coat the chicken before dipping it in egg and panko.
- Eggs: For dipping, it helps the breadcrumbs stick to the chicken.
- Salt and Pepper: For seasoning the chicken.
- Oil (for frying): Vegetable or canola oil works well for deep frying.
- Katsu Sauce: A sweet, tangy sauce made from ingredients like Worcestershire sauce, soy sauce, ketchup, and sugar.
- Rice: Steamed Japanese short-grain rice is traditionally served alongside.
- Cabbage (optional): Finely shredded cabbage is often served as a refreshing side to balance the richness of the fried chicken.
Step-by-Step Recipe:
- Prepare the Chicken:
- Start by trimming any excess fat from the chicken breasts or thighs. If using chicken breasts, you may want to pound the chicken to an even thickness (about 1/2 inch) for consistent cooking.
- Season both sides of the chicken with salt and pepper.
- Breading the Chicken:
- Set up a breading station with three shallow dishes: one with flour, one with beaten eggs, and one with panko breadcrumbs.
- Dredge the chicken in the flour, making sure to coat both sides evenly.
- Dip the floured chicken into the beaten egg, ensuring full coverage.
- Finally, coat the chicken with panko breadcrumbs, pressing gently to ensure the breadcrumbs stick.
- Frying the Chicken:
- Heat oil in a deep skillet or pan over medium-high heat. You need enough oil to cover about half of the chicken cutlets.
- Once the oil is hot (around 350°F or 175°C), carefully lower the breaded chicken into the oil. Fry for 3-4 minutes on each side or until the chicken is golden brown and crispy, and the internal temperature reaches 165°F (75°C).
- Remove the chicken from the oil and drain on a paper towel-lined plate.
- Making Katsu Sauce (optional but recommended):
- In a small saucepan, combine 3 tablespoons of Worcestershire sauce, 2 tablespoons of ketchup, 1 tablespoon of soy sauce, 1 tablespoon of sugar, and a splash of Dijon mustard (optional). Bring to a simmer over medium heat, stirring occasionally. Once thickened slightly, remove from heat.
- Serve:
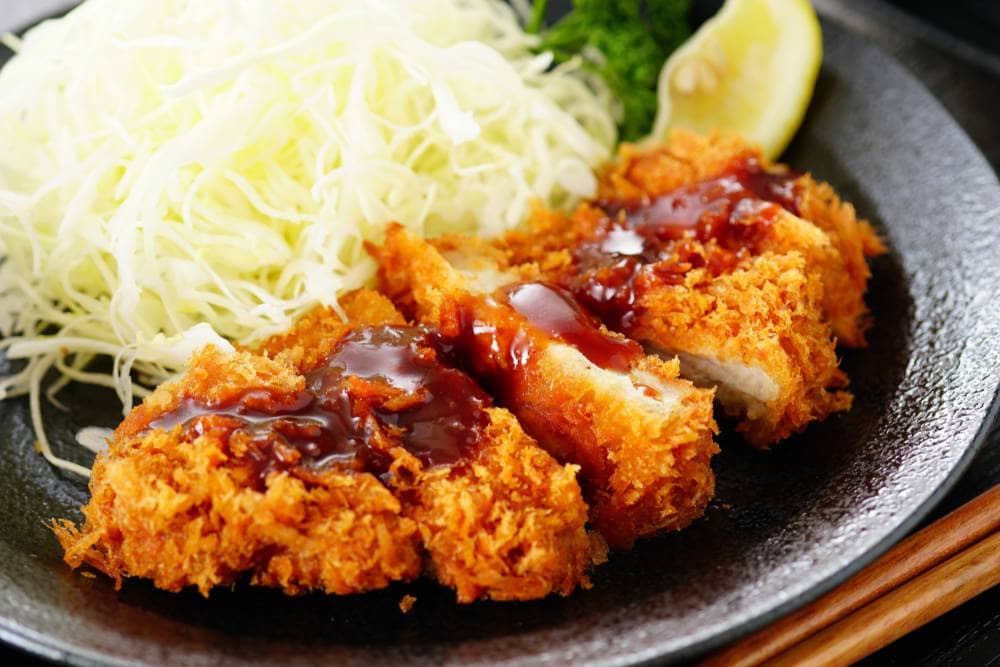
- Slice the chicken into strips. Serve with a side of steamed rice and drizzle with homemade or store-bought katsu sauce. You can also serve with a small pile of shredded cabbage for added crunch and freshness.
Tips for the Perfect Chicken Katsu:
- Panko is Key: The texture of the panko breadcrumbs is what gives Chicken Katsu its signature crunch. Be sure to use Japanese panko for the best result.
- Fry at the Right Temperature: If the oil is too hot, the outside will burn before the inside cooks. If it’s not hot enough, the breading will absorb too much oil and become soggy.
- Double Dredge: For extra crunch, you can double dip the chicken in egg and panko.
- Rest the Chicken: After frying, let the chicken rest for a couple of minutes before slicing it to prevent the juices from running out.
Variations and Customizations:
Health Considerations and Nutritional Value:
- Calories: A standard serving of Chicken Katsu (one piece of fried chicken with rice) typically contains around 500-700 calories, depending on the size of the chicken and amount of oil absorbed during frying.
- Protein: Chicken is a good source of lean protein, especially when you use chicken breast.
- Fats: While delicious, the fried nature of Chicken Katsu makes it high in fat, particularly saturated fat, depending on the amount of oil used for frying.
- Customizations: You can opt for a lighter version by pan-frying the chicken with a small amount of oil instead of deep frying, or bake the breaded chicken in the oven at 400°F (200°C) for about 20 minutes.
FAQ:
1. Can I bake Chicken Katsu instead of frying it?
Yes, you can bake the breaded chicken. Preheat your oven to 400°F (200°C) and place the chicken on a baking sheet lined with parchment paper. Bake for about 20 minutes, flipping halfway through, until the chicken is crispy and cooked through.
2. Can I use chicken thighs instead of breasts?
Yes, chicken thighs are a great alternative! They’re juicier and more flavorful, but make sure to cook them thoroughly, as they may take a little longer than chicken breasts.
3. How do I store leftover Chicken Katsu?
Store leftover Chicken Katsu in an airtight container in the refrigerator for up to 2 days. Reheat in an oven or air fryer to maintain the crispy texture.
4. Can I make Chicken Katsu ahead of time?
You can bread the chicken ahead of time and store it in the fridge for a few hours before frying. However, it’s best to fry it right before serving to ensure maximum crunch.
5. Can I use a gluten-free breadcrumb alternative?
Yes! You can use gluten-free panko breadcrumbs for a gluten-free version of Chicken Katsu. You can also make your own using gluten-free bread.
With its crispiness and delicious flavor, Chicken Katsu is a fun and satisfying dish that’s easy to customize based on your preferences. Enjoy experimenting with different variations, sauces, and sides!
Chicken Katsu recipe
Ingredients
Method
- Season chicken breasts on both sides with salt and pepper. Place flour, beaten egg, and panko crumbs into separate shallow dishes. Coat chicken breasts in flour, shaking off any excess; dip into egg, and then press into panko crumbs until well coated on both sides.
- Heat oil in a large skillet over medium-high heat. Place chicken in the hot oil, and fry until golden brown, 3 or 4 minutes per side. Transfer to a paper towel-lined plate to drain.
- Recipe Tip
- Try serving this with Japanese salad dressing for dipping.
- Editor’s Notes:
- Nutrition data for this recipe includes the full amount of breading ingredients. The actual amount of breading consumed will vary.
- We have determined the nutritional value of oil for frying based on a retention value of 10% after cooking. The exact amount will vary depending on cooking time and temperature, ingredient density, and specific type of oil used.